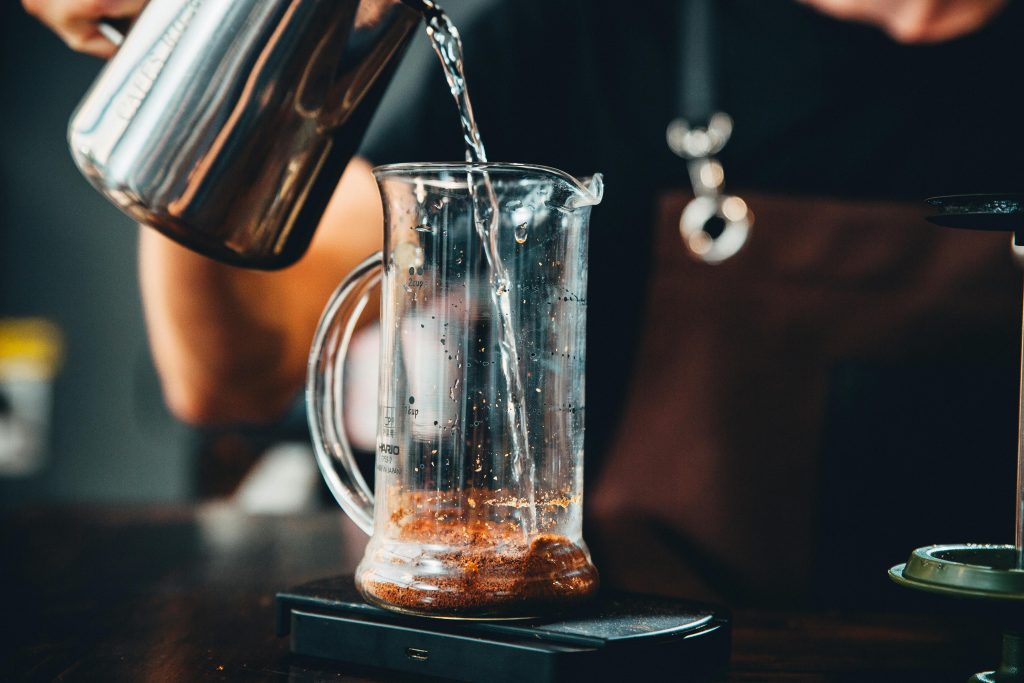
How long should pour-over coffee take? At my café, I usually keep the total brew time between 1:50 and 2:10. But brew time is not just a number. Blooming, pauses between pours, water flow, temperature changes, extraction method, and brewing technique all affect what happens during that time.
In this guide, I explain what counts as total brew time, why pour-over coffee can finish too fast or too slowly, how immersion differs from percolation, and why the same brew time can still produce very different flavors. I also explain why I treat recipe times as references rather than fixed rules.
What Is a Normal Pour-Over Coffee Brew Time?
At my café, I usually keep the total brew time between 1:50 and 2:10. In winter, this amount of time allows the water temperature inside my gooseneck kettle to drop naturally by around 4°C. In summer, even with a fan blowing nearby, the temperature usually drops by only about 2°C.
From my own experience, coffee tastes best when the water temperature drops naturally by around 4°C during pour-over brewing. This is why I have always felt that it is easier to brew delicious coffee in Taiwan during winter. The same applies to roasting. As the ambient temperature rises, roasting becomes much trickier, and producing a good roast becomes more difficult.
Therefore, if you have the opportunity to brew coffee in different environments, such as outdoors at a farmers’ market, pay attention to the ambient temperature. If the weather is cold, remember to start with a higher water temperature and choose a dripper with better thermal insulation. (I will explain this in greater detail in the chapter on coffee drippers.)
Time is just one of the many variables in coffee brewing. The important concept to remember is this: The more time passes, the more the water temperature drops. Temperature directly affects the aroma profile because it influences the rate at which molecules are released and can also cause certain molecular bonds to break.
What Counts as Total Pour-Over Brew Time?
Total pour-over brew time is usually measured from the moment the first water is poured until the final water has completely passed through the coffee bed. Therefore, blooming time, each pouring phase, the pauses between pours, and the final drawdown are all included in the total brew time.
Does Total Pour-Over Brew Time Include Blooming?
Yes. In most baristas’ terminology, the total pour-over brew time includes blooming.
So, how long should you bloom your coffee?
Here’s my quick answer: I usually bloom for 30 seconds when brewing hot coffee and 60 seconds when brewing iced coffee.
You may have heard people say that the fresher the coffee beans are, the harder it is for them to release gas, so they need a longer bloom. I generally agree with this. However, to avoid extending the total brew time too much and allowing the water temperature to drop excessively, I place greater emphasis on controlling the force of my pours and coordinating my eyes and hands throughout the brewing process.
This helps reduce the interference caused by CO₂ escaping from the coffee grounds, which can prevent water from making proper contact with the grounds, affect extraction, and even cause water to accumulate in the dripper.
Very few coffee instructors teach how to control pouring force or coordinate what you see with how you pour. Yet I believe these are among the most important skills for controlling brew time and preventing water from pooling in the dripper. I will cover these techniques in detail in future chapters, which will be available as free articles. (Same as latte art, very few instructors explain how to control our force when making a latte art.)
Now, back to my blooming times. Why do I bloom my iced coffee for as long as 60 seconds?
Because iced coffee uses less hot water passing through the coffee bed. I use 16 g of coffee grounds but pour only around 200 ml of hot water. If I bloom for just 30 seconds, the entire brew may finish as early as 1:20–1:30.
With my brewing method, that is too short. The water temperature inside my gooseneck kettle has not yet dropped to the level I want, and the resulting coffee lacks the richness of flavor I am looking for.
Therefore, I extend the blooming time for my iced coffee to 60 seconds, allowing me to adjust the overall brewing rhythm and the way the water temperature changes throughout the process.
Do Pouring Pauses Count Toward Total Brew Time, and How Do They Affect Pour-Over Coffee?
Pauses between pours are also included in the total brew time.
The more pauses you have between pours, the longer the total brew time becomes. As the total brew time increases, the water temperature drops further. If the temperature drops too much, the extraction yield may decrease.
In addition, I believe there is another disadvantage when the total brew time becomes too long because the pauses between pours are too long: more volatile aroma compounds may be lost. This is mainly because the coffee remains in a hot, open environment for a longer period of time, while water, coffee grounds, steam, and air continue to interact and exchange volatile compounds.
As shown in the Dao Nan Guan video below, they use a fully saturated drip-style pouring technique. Instead of continuing the brew until the final beverage weight is reached, they stop brewing at around 160 g and then add water afterward. Of course, my explanation of the reasoning behind their brewing decision is only my own interpretation. I have not discussed it directly with the owner of Dao Nan Guan.
During cupping, most of the coffee grounds settle at the bottom of the cupping bowl and are not directly exposed to the air. Some of the released aroma compounds can enter and remain in the coffee liquid. This does not mean that cupping does not lose aroma, but rather that pour-over and cupping create different conditions for aroma release and retention.
How Many Pours Should We Use for Pour-Over Coffee?
I usually use 4 pours, which means there are 3 pauses between pours.
When I use pour-over as the serving method for hot coffee, I usually pause pouring at around 48 g, 100 g, and 180 g. Including the bloom, this means I use 4 pours in total.
The total brew time needs to be carefully controlled. As I mentioned earlier, I usually keep it between 1:50 and 2:10.
min
Too short
mins
Just right
mins
Too long
Aroma Loss Through Volatilization
Low
Moderate
High
Temperature
Insufficient cooling, potentially leading to over-extraction
Temperature drops by 2–4°C, resulting in a moderate extraction level
Too much cooling, reducing the extraction yield
Why Is My Pour-Over Coffee Taking Too Long?
When pour-over brewing takes too long, it is usually because water accumulates in the dripper. Most coffee instructors would say that the grind is too fine, but I do not believe that is the main reason. Even with a very fine grind, coffee can still brew smoothly.
There are several common causes that most people may not even notice:
Improper control of pouring force and poor coordination between the eyes and hands.
As gas escapes from the coffee grounds, the stream of water from above may push it back down, preventing it from escaping properly and forcing it back into the coffee bed. When we continue pouring, the incoming water encounters the trapped gas and cannot find a clear path through the dripper, causing water to accumulate. The ribs of a coffee dripper are designed to help air escape.
Too much residual moisture remains inside the coffee beans after roasting.
This can prevent water from flowing smoothly through the coffee bed, causing water to accumulate. (*see explanation “RoR Crash” below)
The filter paper is too fine, restricting the flow of water.
For example, CAFEC’s T-92 filter (see picture below) requires particular care when brewing. These days, I hardly ever use T-92 filters.
Fines Migration.
During pouring or agitation of the coffee bed, fine coffee particles may gradually migrate toward the filter paper, clogging some of its pores and causing the water flow to slow down. Even when using a coarser grind setting, the coffee grounds may still contain fines. Therefore, grinding coarser does not necessarily solve the problem of water accumulating in the dripper.
The opening at the bottom of the dripper is too small, restricting water flow.
Similarly, if the channels between the dripper’s ribs are too narrow, water may flow through too slowly.
*Removing just the right amount of moisture from coffee beans during roasting requires several adjustments working together. If the RoR crashes during the roast, it means that a large amount of water vapor escapes all at once, preventing heat from penetrating deeper into the beans. As a result, excess moisture may remain inside the beans.
Another way to understand this is that enough heat needs to penetrate into the bean’s core before its outer layers transition from the rubbery state back to the glassy state.
Please note that this chapter focuses specifically on pour-over coffee. When water accumulates in the dripper and extends the brew time excessively, the resulting coffee often tastes unpleasant because some coffee particles become over-extracted while others remain under-extracted.
When water flow is unevenly distributed throughout the coffee bed, certain areas may receive a continuous flow of water, while other areas—such as the grounds near the center of a conical dripper—may already be wet but receive insufficient fresh water flowing through them. As a result, some areas may become over-extracted while others remain under-extracted.
Why Is My Pour-Over Coffee Brewing Too Fast?
To answer your question quickly, here are several possible reasons why your pour-over coffee may finish brewing too quickly:
Using too little coffee.
When maintaining the same brew ratio, using less coffee also means using less water, which may shorten the total brew time.
Pouring mostly around the outer edges of a conical dripper rather than closer to the center.
In a conical dripper, the coffee bed is thicker in the center and thinner around the edges. Water passing through the thinner areas encounters less coffee and may flow quickly along the channels between the dripper’s ribs into the server, shortening the brew time. This phenomenon is known as bypass.
Pouring with too large a stream of water.
Many people are afraid of water accumulating in the dripper, so they pour with a large stream and quickly finish adding the required amount of water. In fact, even a small stream can have considerable penetrating force. I will spend more time explaining how to control pouring force in future chapters.
Most people would simply suggest grinding finer. But what if the original grind size is already suitable for that particular coffee? Grinding finer just to extend the brew time may change the flavor profile you were originally aiming for. What should you do then?
This is also why I have always believed that roasting and brewing need to be understood together. The weight loss and structural changes of coffee beans can vary from one roast to another. When the roaster is also responsible for brewing, they can use their knowledge of that particular batch to make a more informed decision about the starting grind size.
If a barista is not involved in roasting, they need to gradually understand these differences through communication with the roaster and their own brewing results. However, even when they actively ask the roaster, they may not always receive enough information about the roast.
Does Longer Brew Time Mean More Extraction?
If we use the same extraction method, theoretically, the longer the brew time, the more soluble compounds will be extracted.
However, the situation is different when comparing immersion and percolation. For example, immersion might take 8 minutes to achieve the same extraction yield as 2 minutes of percolation.
Cupping is a representative example of immersion, while pour-over coffee is a representative example of percolation. The flavor profiles produced by these two methods can be quite different.
Immersion:
Soluble compounds in coffee gradually enter the surrounding water through diffusion. Because the coffee grounds remain immersed in the same water, the concentration of dissolved compounds increases over time. As the concentration gradient gradually decreases, the extraction rate also slows down. In addition, diffusion itself is a relatively slow process.
Percolation:
Fresh water continuously flows through the coffee bed, carrying away dissolved compounds through advection. This allows the coffee grounds to remain in contact with water containing a lower concentration of dissolved substances, maintaining more efficient mass transfer.
Gagné also suggests that even when the two brewing methods achieve the same final extraction yield, their flavor profiles may still differ. According to his simulation model, the proportions of chemical compounds extracted by the two methods may not be the same.
I strongly agree with this perspective. In my view, percolation is a more forceful extraction method compared with immersion. Water is poured directly onto the coffee grounds, creating more physical flushing, whereas immersion provides a gentler and more subtle extraction process, although it is somewhat slower.
In my opinion, this is also why we use so many different coffee drippers: their different structures allow us to fine-tune the extraction process.
Why Can the Same Brew Time Produce Different Flavors?
Because, even within the same amount of time, the coffee grounds can be extracted using different methods.
Why Can the Same Brew Time Produce Different Results? Immersion vs. Percolation
Cupping can taste very good even after eight minutes, but if a pour-over takes eight minutes because water has accumulated in the dripper, it usually will not taste very good.
mins
Brewing Time
8-minute brewing, different methods
Cupping
Pour-Over
Extraction Mode
Immersion
Percolation
Flavor
Full-bodied, rounded, complete
Muddled, bitter, indistinct
Why Can the Same Pour-Over Brew Time Taste Different With Different Techniques?
Because, within the same amount of time, the same extraction method can be used with very different extraction techniques. For example:
mins
Brewing Time
3-minute pour-over
Using a T-92 filter paper that causes water to accumulate
Using a slow-drip technique
Grind Size
Normal
Fine (in my opinion)
Brew Ratio
1:15
1:10
Flavor
Muddled, bitter, indistinct
Full-bodied, rounded, complete
For your reference, here is a demonstration video of the slow-drip technique used in a famous coffee shop/brand in Taiwan “道南館 (Dao Nan Guan)” recorded by James Lyrics Coffee.
Regardless of the extraction method, we generally want every coffee particle to be extracted as evenly and consistently as possible. The pour-over method used by Dao Nan Guan in the video above follows the same idea. They have clearly stated on social media that their Taipei location brews according to what they call the “complete saturation principle.”
I personally agree with this approach because I believe each layer carries different flavors, and those flavors can be highly diverse. A good cup of coffee should allow all of these layers to release an appropriate amount of their compounds under similar extraction conditions.
Those layers are eventually ground into particles. If each particle is extracted in a similar way, then the compounds originating from the different layers also have a better chance of being extracted more completely. In my view, the resulting effect can be somewhat similar to cupping.
Why Cupping Can Taste Good Even With a Much Longer Brew Time
I want to mention cupping specifically here. Why can cupping take 8–12 minutes and still taste so good? Cupping primarily uses immersion. Soluble compounds in the coffee gradually move into the surrounding water through diffusion. As the concentration of dissolved compounds in the water increases, the extraction rate gradually slows down.
By comparison, pour-over is a form of percolation. Fresh water continuously flows through the coffee bed and carries away dissolved compounds through advection, allowing mass transfer to remain relatively efficient.
In addition, the coffee cools naturally quite a lot throughout the cupping process. As I mentioned earlier in “What Is a Normal Pour-Over Coffee Brew Time?”, temperature has an important influence on coffee. In my experience, coffee that cools naturally can taste exceptionally good. Cupping also allows us to taste the coffee oils, which often carry many aromatic compounds. For these reasons, cupping is personally my favorite way to experience coffee flavor.
I believe every roaster and barista should understand cupping. On one hand, it is an important way to evaluate roasting. On the other hand, it also helps us understand the principles of extraction. I wrote an article about this that is worth reading: Coffee Cupping After Roasting: Evaluating Flavor and the Roast Profile
To explain diffusion and advection, I want to use a slightly inelegant but very practical example.
After using the bathroom, if we simply let the odor slowly escape through an open window, it may take at least 20 minutes before the smell disappears. But if we place a fan near the doorway, whether it is blowing inward or outward, the moving air can speed up the dispersal of the odor. Of course, if the fan merely circulates the air inside the room, the odor may not actually leave the room. Effective removal still requires a proper ventilation path.
This is my most everyday explanation of diffusion and advection: diffusion relies on molecules gradually spreading out, while advection uses moving air—or, in coffee brewing, moving water—to carry those molecules from one place to another.
Should You Follow the Recipe’s Brew Time Exactly?
No, I wouldn’t. There are many people on YouTube and social media sharing their own “successful” pour-over recipes, but I usually treat them only as references.
What really matters is understanding the fundamental logic behind coffee brewing and knowing how different variables interact with one another. That way, when you come across someone else’s pour-over recipe, you can break down why they chose those settings instead of simply following the numbers.
Coffee Brewing Fundamentals: How Grind, Time, Temperature, And Ratio Work Together
February 04, 2026
Many brewing problems often come from adjusting the wrong variable first, or from treating grind size, time, temperature, and brew ratio as separate settings […]
Coffee Brewing Fundamentals: How Grind, Time, Temperature, And Ratio Work Together
February 04, 2026
Many brewing problems often come from adjusting the wrong variable first, or from treating grind size, time, temperature, and brew ratio as separate settings […]
In addition, when deciding how to brew a coffee, I also refer to the end temperature and weight loss of that particular roast. With my own brewing approach, the higher the end temperature, the lower the brewing water temperature I tend to use; the greater the weight loss, the less brewing water I tend to use.
The reason is simple: even with the same coffee, the condition of the beans after roasting will never be exactly the same from batch to batch. Achieving perfect consistency in roasting is very difficult, especially when the seasons change. In order to avoid roast defects, it is difficult to keep the end temperature and weight loss exactly identical every time.
For this reason, I consider roasting records to be part of the brewing decision-making process. If you do not know how a particular batch of coffee was roasted, it is difficult to rely on one fixed brew time or recipe and expect exactly the same result every time.
If you would like to understand more about how I think about these roasting variables, you can read my Aillio Bullet Roasting Guide. It contains many practical roasting articles that I hope will help you understand the coffee you are working with more completely.
FROM BREWING BACK TO ROASTING
To Understand Your Brew, Understand Your Roast
The way I brew a coffee starts with how that coffee was roasted. End temperature, weight loss, and bean structure all influence my brewing decisions.