Therefore, the physical structure of a coffee bean does not remain fixed throughout roasting. As local temperature and moisture continue to change, different regions of the bean may transition between the glassy and rubbery states. This is one important reason why coffee beans display different physical properties at different stages of roasting.
Temperature, heat, color, and time are some of the most common ways we describe coffee roasting, but none of them can explain a roast on its own.
On the Aillio Bullet R1 / R2, temperature readings, RoR, roast color, and weight loss provide useful information, yet they reveal only part of what is happening inside the bean.
This article explores how heat transfer, moisture release, and changes across different layers shape these measurements—and why understanding their relationships is more useful than simply following individual numbers or predetermined roast times.
mins
Reading Time
Why Temperature, Color, and Time Cannot Tell the Whole Story
Coffee roasting has been studied for decades. A vast amount of information is available online, and many books have been written on the subject. Yet why do so many people still find coffee roasting confusing?
One reason is that the physical and chemical changes occurring simultaneously inside the beans are difficult to measure directly and completely during an actual roast. The temperature, RoR, and color we observe reveal only part of what is happening. Some explanations are based on experimental findings, others rely on physical models, and much of the information becomes oversimplified as it is passed along.
What Should We Do Now?
What keeps us from getting lost in this complexity is a foundation of first principles that do not easily change. By starting with the basic relationships among temperature, heat, moisture, pressure, and changes in matter, we can evaluate whether an explanation is reasonable instead of simply memorizing its conclusion.
Some courses leave people with more questions than answers, while certain ideas can make everything suddenly click once they are understood. I hope this chapter, together with the content I share throughout this website, will gradually help answer your questions about coffee roasting.
IBTS Reading and Heat Transfer
In the article How to Roast on the Aillio Bullet R1 / R2 Coffee Roaster, I tried to summarize coffee roasting in one sentence: “To guide the ‘just right amount of heat’ into the desired layers, while controlling how much moisture and terroir each layer is able to lose.”
On a coffee roaster, adjustments to power, fan speed, and drum speed all affect heat transfer. Heat transfer matters because thermal energy drives moisture migration, vaporization, and release inside / from the coffee bean, while also influencing the rate at which chemical reactions occur. Therefore, before making any adjustment, we should first consider how that action will change the way the coffee receives heat. Coffee-roasting research also commonly treats bean temperature, heat transfer, and moisture transport as coupled processes rather than focusing on a single temperature reading.
Many discussions about roasting rely primarily on thermometer readings. Temperature readings are certainly important, but they are far from sufficient to fully explain the heat transfer that the coffee beans have actually experienced.
If we temporarily set fan speed and drum speed aside and discuss only the power setting, we can roughly describe the planned heat-input strategy of a roast using three elements:
Preheat temperature (PH) + Maximum power + How power is decreased
I will explain how these elements can be combined in the Member’s Section.
But can we really ignore fan speed and drum speed? Of course not. As discussed above, power, fan speed, and drum speed all change heat transfer. This, in turn, affects how moisture leaves the beans, how chemical reactions proceed, and the rate and extent of those reactions.
For this reason, we cannot consider only the numbers shown by the thermometer. The temperature of the roasting environment and the temperature of the coffee beans both contribute to heat transfer. The following article provides a general explanation of the forms of thermal energy available to roasters: Convection, Conduction, and Radiation in Coffee Roasting: Heat Transfer on the Aillio Bullet R1 / R2
RoasTime can use IBTS, bean probe temperature, or time as recipe triggers. These triggers can serve as operational prompts, but a single IBTS temperature point cannot represent the condition of every layer inside the coffee bean. Aillio defines the IBTS as a sensor that uses infrared radiation to measure bean-mass temperature. The infrared signal comes mainly from the bean surfaces visible to the sensor; it does not directly measure the temperature of the bean core or the different internal layers.
A single IBTS reading cannot directly tell us:
how thermal energy is currently distributed inside the bean
the moisture content of the different layers
how much the flavor precursors, or terroir expression, have changed in different parts of the bean
the current rate and intensity of the various chemical reactions
What a profile tells us is how the heat we applied created the trends shown on the graph. What we can directly observe, however, is limited mainly to temperature readings and Rate of Rise. Although a profile or graph cannot provide a complete picture, we should still make an effort to interpret what it can tell us.
There are very few in-depth articles online explaining how to read IBTS, Bean Probe, and Rate of Rise together. For this reason, I spent a great deal of time writing several articles on the subject. You can begin with: RoR in the Aillio Bullet R1 / R2: How to Read IBTS and Bean Probe
The Relationship Between Color, Moisture, Weight Loss, and Temperature
Quick Summary
Because this section is important and relatively long, here is a quick summary before we examine each relationship in detail:
Roast color and the remaining moisture in different layers do not have a simple positive or negative correlation. Moisture affects local heating through energy absorption, evaporation, moisture migration, and the formation of a drying front within the bean. These processes can delay browning and color formation. However, a darker layer does not necessarily contain less remaining moisture, nor does a lighter layer necessarily contain more. *See reference below
In my experience, darker roasts generally show greater weight loss and a higher end temperature. However, the total WL of a batch cannot directly tell us which layers contributed most to that loss. Whenever we discuss WL, we should also ask: from which layers did most of the mass loss occur?
Greater moisture loss generally contributes to greater WL, but water is not the only source of weight loss. Roasting also releases CO₂, volatile compounds, and other products of thermal decomposition. In my experience, some batches receive sufficient heat in the deeper layers and lose an appropriate amount of moisture while still maintaining a relatively low WL. In contrast, some batches receive insufficient heat in the core but produce a higher WL because the bean surface reaches a slightly excessive end temperature. This is why, in the absence of roast defects, I try to minimize unnecessary WL.
Compared with color, moisture, and weight loss, temperature is a more direct real-time measurement. The Aillio Bullet IBTS indicates the surface temperature of the bean mass. Under comparable conditions with the same coffee, a higher temperatureusually indicates thatthe surface has progressed further through the roast and that more surface moisture has migrated or escaped. However, the IBTS does not directly measure how much moisture remains at the surface.
*Reference: Because moisture influences local heating through heat and mass transfer processes, including evaporation and the formation of drying fronts within the bean (Fadai et al., 2017) , while roast color develops from accumulated browning reactions such as melanoidin formation (Bekedam et al.), roast color is better understood as an indirect record of the bean’s thermal and moisture history, rather than a direct indicator of its remaining moisture content.
Therefore, darker color in a particular layer does not necessarily indicate lower remaining moisture, nor does a lighter layer necessarily contain more moisture.
Why Do Coffee Beans Turn Brown During Roasting?
During roasting, sugars and amino acids in coffee beans undergo the Maillard reaction, while caramelization also occurs, gradually forming brown melanoidins and other dark-colored compounds.
As the temperature rises and the roast progresses, some organic compounds undergo further thermal decomposition and carbonization, causing the beans to change from green to yellow, then brown, and eventually nearly black. A darker color generally indicates a greater extent of thermal reactions, but it does not necessarily mean that the center of the bean has been roasted evenly or fully developed.
Can Roast Color Predict Flavor?
I don’t think the colors (spread) of a bean can fully represent the cup. (Spread means the difference between whole bean and ground color readings.)
Primarily Consider Heat and Moisture Release
When discussing flavor, many roasters rely on color alone as a way to communicate roast development. However, I have repeatedly emphasized that heat transfer and moisture release should be considered first.
For most people, the relationship between color and heat is relatively easy to understand. But does moisture also affect color development and browning? Does Moisture Slow Browning?
Browning describes the visible result, while the Maillard reaction is one of the chemical pathways that produces browning. The Maillard reaction will be discussed in the following section; here, we will first focus on browning itself.
Browning in food generally includes:
Maillard reaction: Reducing sugars react with amino compounds through multiple stages, producing aroma compounds and brown polymers, including melanoidins.
Caramelization: Sugars decompose and polymerize at high temperatures without the participation of amino acids.
Enzymatic browning: For example, when an apple is cut open, phenolic compounds oxidize through enzymatic activity and turn brown. The high-temperature stages of coffee roasting generally do not belong to this category.
Other thermal decomposition and oxidation reactions: As the roast becomes darker, pyrolysis, polymerization, and carbonization continue to deepen the color.
When it comes to color change and browning, the relationship between moisture and browning is not as strong as many people may assume. Whether the coffee becomes too dry, remains too moist, or contains an appropriate amount of moisture during roasting, it will still become darker and may eventually turn black.
Coffee that undergoes chemical reactions while carrying too much moisture may develop a vegetal bitterness. You may have tasted beans with this type of bitterness, yet after grinding, the coffee grounds probably still appeared normally brown or black. In other words, whether or not excess moisture is present, coffee will still darken when exposed to heat. Related Reading: Vegetal Or Green Bitterness In Coffee Roasting
Can Other Visual Cues Tell The Flavor
Using color to judge flavor is still fundamentally a visual assessment. Although I do not agree with evaluating flavor based only on visual cues and numerical values—for example, color readings and temperature readings—these are still the most direct forms of information available for communicating about roasting online. For that reason, they are still worth discussing.
In addition to observing color, examining the cross-section of the bean, and reading the roast profile, the degree of bean expansion can also serve as a useful indicator.
Greater bean expansion can indirectly indicate that the cells inside the bean have been subjected to stronger pressure from water vapor. It also suggests that the bean structure has been more deeply affected by the heat carried through that vapor. In my experience, coffee roasted in this way often presents a better sense of openness and dimensionality in the cup, along with a rounder mouthfeel.
Note:Overemphasizing bean expansion can also lead to roast defects. This is one of the difficult things about coffee roasting: both too much and too little can create defects, and they often produce similar flavors, making it difficult to decide how the roast should be adjusted.
For this reason, I believe that communicating about roasting solely through color provides an incomplete picture. Color alone does not faithfully represent the coffee’s overall flavor development. Even when some professionals suggest including weight loss in the discussion, I still do not consider that sufficient to provide a complete assessment.
What Visual Cues Alone Cannot Tell Us About Coffee Roasting
What actually requires the most time to understand is heat transfer and moisture release, because these are what allow us to create the layers we want. Unfortunately, neither heat transfer nor moisture release can be judged easily with the naked eye.
So how can we create the layers we want?
In the post RoR Is Also Closely Related to Flavor Continuity, I explained that when the RoR declines smoothly, it at least suggests that we are able to create layers with a normal color gradient. However, this does not necessarily mean that we have retained the amount of moisture and terroir expression we want.
There are two main situations in which a normal gradient may fail to form:
When the RoR curve crashes or stalls
When heat penetration is too strong and the roast progresses too quickly
In the 1st situation, the moisture chain may be interrupted, preventing heat from continuing to move deeper into the bean through water vapor.
Let’s look at the 2nd situation: When heat penetration is too strong and the roast progresses too quickly
In the second situation, the outside may become dry while the inside remains too moist. The center of the bean may become darker, while the exterior appears slightly less dark. This can happen because the outer structure has already hardened and returned to a *glassy state. If too much moisture remains inside the bean and cannot escape smoothly, the trapped vapor may continue heating the core. In severe cases, this may create a vegetal bitterness. In fact, roasting too quickly (in the 1st situation) can also create this dry-outside, moist-inside condition.
Because every roaster experiences a crash at a different point in the roast, the resulting break in the gradient will also be different. This creates hundreds of possible forms of discontinuity.
So what should roasters prioritize during a roast?
Regardless of the planned inputs for a particular batch, we should always try to achieve a decreasing RoR. Otherwise, the number of possible variables becomes almost impossible to discuss. For further reading, see: What Is RoR in Coffee Roasting? Why Should RoR Gradually Decline?
Achieving a steadily decreasing RoR is extremely difficult. Even experienced professionals may not be able to achieve it consistently in every roast.
How to Roast Good Coffee Without Relying on Visual Cues
Honestly, I do not use a trier to take samples during roasting, and I rarely measure roast color in my daily work. For a one-person business, roasting is only one part of the job. After roasting, you still need to cup the coffee, package the beans, and sometimes produce drip bags. You also need to plan marketing strategies and manage the website and social media. In reality, there is not much time to take extra samples, evaluate aromas, and measure color during every batch.
I avoid using a trier not only because these tasks take time, but also because sampling itself introduces risks. When the trier is pulled out, cooler outside air may be drawn into the roaster and disturb the existing thermal environment inside the drum. At the same time, taking a sample, smelling it, and examining the beans can distract the roaster and cause them to miss the right moment to adjust power, change fan speed, or drop the batch.
This problem becomes especially significant after first crack. In my experience, natural-processed coffees undergo very intense physical / chemical changes after first crack, while their temperature and moisture loss can also change rapidly. Sometimes a difference of only two seconds can produce noticeable differences in end temperature, weight loss, and the final flavor. At this stage, I would rather focus all of my attention on the profile, RoR, the roaster’s response, and the timing of the drop than remove beans for inspection.
Furthermore, when a roasting method depends heavily on smell or visual judgment, it can easily be affected by the roaster’s physical condition and the surrounding environment. If the roaster catches a cold and temporarily loses their sense of smell, a decision-making method built around aroma may no longer be usable. Lighting, surrounding colors, olfactory fatigue, and individual differences in how people perceive yellow or brown can also affect judgment. For this reason, I do not want my roasting system to depend on these conditions in order to work.
I am not suggesting that visual cues have no value. Color can provide useful supporting information and help us compare different batches. However, color alone cannot tell us whether heat has reached the deeper layers, where moisture has been released from, or whether the bean core has received sufficient heat. What we truly need to understand and control is still heat transfer and moisture release. Color is only one of the visible results left behind by the accumulation of these processes.
Not sampling or measuring color does not mean that simply watching the curve is enough. Roasters must be able to taste whether their coffee contains roast defects. Obvious problems may include peanut-like flavors, vegetal bitterness, or other underdeveloped characteristics. When the problem is less severe, the coffee may simply taste muted or closed. In my experience, whenever part of the coffee tastes compressed, dull, or unable to open up, it suggests that some location inside the bean still needed a more appropriate amount of heat. Many coffees may not display an obvious roast defect, yet the core has still not been fully developed. This is the kind of issue that only highly demanding roasters continue to investigate.
When the problem becomes slightly more severe than a muted flavor, the coffee may develop a peanut-like character. However, when the previously underheated area receives a more appropriate amount of thermal energy, the flavor can sometimes shift from closed and peanut-like to something more open, or even express attractive floral aromas. This is why the final judgment of whether the bean core has been fully developed must still come from cupping rather than from surface color or any single measurement.
The knowledge taught in the Member’s Section will help you develop enough confidence to roast decent coffee without relying on trier sampling or color measurement. This method does not ask you to set one group of numbers before the roast and use them forever. Instead, it helps you build a decision system that can predict how a roast is likely to progress and adapt to what actually happens during the batch.
End Temperature and Development Time Are Dynamic but Predictable
In practice, I first consider the coffee itself, the batch size, the intended roast degree, and the coffee’s actual behavior during roasting. Based on these factors, I determine an appropriate end temperature and development time. Both targets are dynamic but predictable. They are not fixed numbers that must remain identical from batch to batch.
They change according to the coffee’s characteristics, the environment, and the direction of the roast. However, once you truly understand heat transfer, moisture release, and changes in the profile, they are not unpredictable outcomes that can only be decided by instinct at the very end.
After roasting, I use cupping to evaluate the development of the bean core and make small adjustments in the next batch. In other words, I do not rely on a trier or color to determine every action during the roast. I first establish a repeatable decision-making system and then use flavor to verify whether those decisions were correct.
Of course, when time allows and a more precise or systematic comparison is needed, I am not opposed to measuring roast color. However, it is important to understand that color remains supporting information. What ultimately determines how the inner and outer layers of the coffee develop is still heat transfer and moisture release.
The Relationship Between Moisture and Temperature
The IBTS (Infrared Bean Temperature Sensor) works by measuring the infrared radiation emitted by the surface of the coffee beans and converting that radiation into a temperature reading.
Any object above absolute zero emits infrared radiation, and the hotter the object becomes, the greater the amount of radiated energy generally becomes. The IBTS uses a lens to collect the infrared radiation emitted by the bean surfaces within its field of view. The sensing element then converts that radiation into an electrical signal. Based on its calibration model, the sensor’s own temperature, and the configured emissivity, the system calculates the temperature displayed in RoasTime.
Simply put, the Bean Probe responds to heat transferred to the probe by the surrounding material, while the IBTS “sees” the infrared radiation emitted by the bean surfaces and converts it into a temperature reading.
Have you noticed that the turning point, yellowing point, and first crack temperature are different for every coffee? Even when roasting the same coffee, the yellowing point and first crack temperature may still vary from batch to batch. What do these differences represent?
Moisture vs Temperature
The IBTS readings at important events indicate how much moisture is currently present near the bean surface. A lower yellowing temperature suggests that the surface is wetter.
This is an important indicator. In my experience, a lower yellowing temperature usually corresponds to a lower first crack temperature. The temperatures of these important events also vary among different coffees. For example, natural-processed coffees generally reach yellowing and first crack at higher IBTS temperatures than washed coffees.
Even when roasting exactly the same coffee, the yellowing and first crack temperatures may differ slightly from batch to batch. These variations are closely related to how the roaster adjusts the inputs in response to the weather and environmental conditions of that particular day.
I pay less attention to the turning point. Instead, I believe that the preheat temperature sets the direction of the roast, because the turning point is determined to a large extent by the preheat temperature.
The temperatures recorded at the beginning of the Maillard phase and at first crack are important indicators. However, I would rather have roasters understand how many layers are participating in the Maillard reaction and caramelization when these events occur. In other words, how deeply has the heat penetrated into the bean at that moment? One of the difficulties of coffee roasting is that we usually cannot evaluate these conditions until after the roast by cupping the coffee, measuring weight loss, or measuring roast color. If we wanted to assess them during the roast itself, real-time sampling might be one of the only available options.
Glass Transition in Coffee Roasting: How Temperature and Moisture Change Bean Structure
Roasting not only triggers chemical reactions inside the coffee bean, but also changes its physical structure. Scientists use the term glass transition temperature (Tg) to describe the critical temperature at which a material changes from one physical state to another.
Glassy State & Rubbery State
The glass transition temperature is the temperature range in which a material changes from a hard, brittle glassy state to a softer, more elastic rubbery state. This does not mean that the coffee bean melts. Instead, molecular mobility within the bean increases, allowing the structure to become more flexible.
During roasting, every location inside the coffee bean has its own local temperature and local Tg. Because the outer layers and the core contain different amounts of heat and moisture, they do not necessarily enter the same physical state at the same time.
The Relationship Between Local Temperature and Tg
Local temperature < Tg
The bean structure is hard and more likely to fracture.
The material is in a glassy state.
Before roasting, green coffee stored at room temperature can generally be considered to be in this state.
Local temperature > Tg
The bean structure becomes softer and more elastic.
The material is in a rubbery state.
As the bean gradually heats during roasting, different regions may cross their local Tg.
How Moisture Affects Tg
Higher moisture content
Water has a plasticizing effect and lowers Tg.
As a result, regions with more moisture can enter the rubbery state at a lower temperature.
Lower moisture content
As moisture is lost, Tg generally increases.
If the local temperature in that area does not remain above the new Tg, it may gradually become more glass-like and rigid, especially after losing a large amount of moisture during roasting.
Therefore, the physical structure of a coffee bean does not remain fixed throughout roasting. As local temperature and moisture continue to change, different regions of the bean may transition between the glassy and rubbery states. This is one important reason why coffee beans display different physical properties at different stages of roasting.
Because temperature and moisture are not distributed evenly throughout the bean, different locations within the same coffee bean may exist in different physical states at the same time.
This also helps explain why roasted coffee must be cooled rapidly immediately after the roast. Quickly lowering the beans below Tg allows the structure to return to a rigid glassy state. First, this reduces the kinetic energy of aroma molecules. Second, it helps trap those aroma molecules within the hardened cellular structure.
Once coffee beans leave the drum, roasting does not stop immediately. The beans still retain a significant amount of thermal energy, and internal reactions may continue. For this reason, cooling speed affects not only your workflow, but also the roast endpoint you originally intended to achieve.
If your cooling tray takes several minutes to cool the beans completely, the final roast result may continue to drift away from the decision you made at drop.
The Café Naturêve Coffee Cooling Tray uses an independent power supply and high-airflow design to cool coffee beans in approximately 1–2 minutes, helping stop post-roast thermal reactions more quickly and making the endpoint of each batch easier to reproduce consistently.
What Does Weight Loss Tell Us About a Coffee Roast?
Weight Loss (WL) tells us how much total mass the entire coffee bean has lost, but it cannot tell us how much mass each individual layer has lost.
In Color Measurement: Best Practices, Scott Rao points out that measuring both whole-bean color and ground-coffee color can help roasters understand the difference in roast color between the outer and inner parts of the bean.
In the final paragraph, he writes:
If, for example, our roasted weight loss for several batches of a given coffee is 11.0, 11.0, 11.0, 11.0, but the ground-color readings are 98, 100, 102, 104, there is almost certainly an error in the color measurements.
It is true that when batches have the same WL but different color readings, the inconsistency may, as he suggests, come from errors in the measurement process. However, based on my roasting experience, I am also inclined to believe that these differences may result from moisture and other compounds being released or retained to different degrees across different layers.
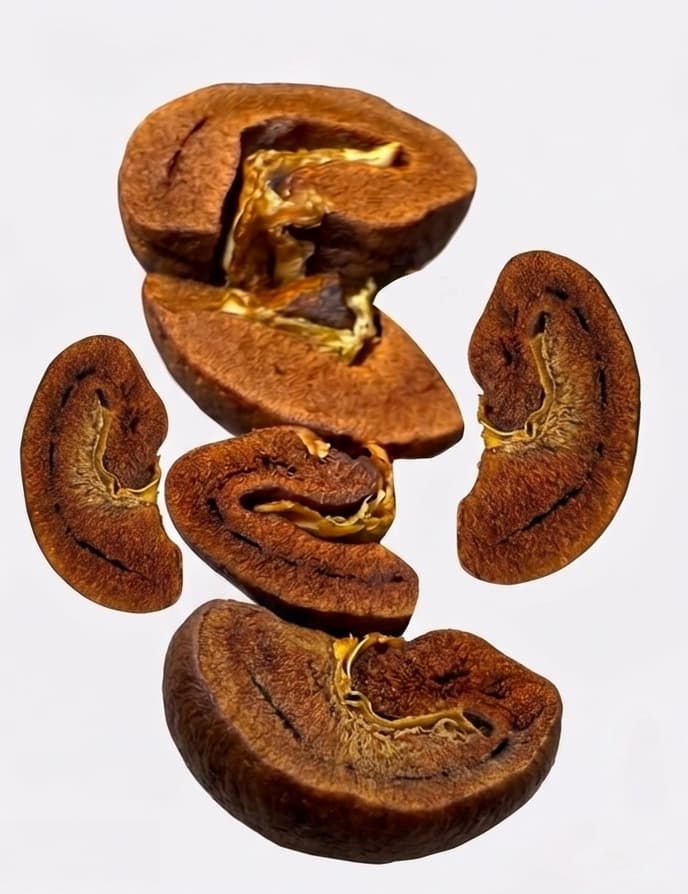
Even coffee beans roasted together in the same batch can display different colors and degrees of expansion because of differences in density, as shown in the image below.
Although this image was generated using AI, it faithfully reflects the different responses that beans within the same batch may have to thermal energy. In actual roasting, beans from the same batch can sometimes show these kinds of differences.
Sweet Maria’s has also shared real cross-sectional photographs comparing the internal structure of City+ and Dark Roast coffee. In addition to color, we can observe the degree of bean expansion and the differences in internal structure. Darker-roasted beans generally have a less compact internal structure and somewhat greater porosity.
The more moisture a coffee loses, the higher its WL will generally be, but water is not the only source of mass loss. During roasting, coffee also loses CO₂, volatile compounds, and other products of thermal decomposition. From the outer surface to the core, every layer loses mass, while total WL is simply the combined mass loss of all layers.
What the roaster actually controls is how thermal energy enters the different layers. How much water and other compounds each layer ultimately loses is the combined result of heat transfer, chemical reactions, and structural changes.
In my experience, some batches receive an appropriate amount of heat in the deeper layers and lose an appropriate amount of moisture while still producing a low total WL. Conversely, other batches may have insufficient heat reaching the bean core but still show a higher WL because the bean-surface end temperature was too high.
This is why, as long as no roast defects are present, I try to minimize unnecessary WL. In my experience, this usually helps preserve more aromatic compounds, allowing the coffee to taste juicier and more enjoyable, with a greater sense of openness and dimensionality.
Can Roasters Control Roast Time?
Quick answer: Roasters can influence roast time, but they should not control time directly. A reasonable roast time should emerge naturally from the available heat and the coffee’s response.
How Coffee Courses and Certifications Mislead Roasters About “Standard Roast Times”
The first time I attended an Aillio Bullet R1 roasting course in Taichung, the instructor introduced the term “standard roast.” According to him, coffee roasting had a “standard time”: first crack should occur at around 9:00, with a tolerance of approximately ten seconds. Otherwise, the roast would be classified as either a fast roast or a slow roast.
However, while introducing these classifications, he did not further explain what “fast” or “slow” actually meant, nor did he explain why first crack should occur at around nine minutes.
Later, when I took the SCA roasting certification exam elsewhere, another instructor again expected us to reach first crack at approximately nine minutes.
However, the Bullet course used an Aillio Bullet R1, which is electrically heated, while the SCA certification exam used a Fuji Royal 1 kg roaster, which is gas-fired. The two roasters differ in heat source, drum structure, heat-transfer characteristics, sensors, and available operating methods. The coffees and batch sizes used were not necessarily the same either, yet both treated first crack at around nine minutes as the target.
This led me to ask: if both roasters are controlled to reach first crack at nine minutes, will the coffee taste the same? On what conditions is a “standard roast time” actually based? And if everyone follows standard methods, standard times, or even recipes, why do so many people still remain confused about coffee roasting?
The Blind Spot in Coffee Roasting Science: Trying to Match Standard Roast Times
I agree that coffee roasting is a science. However, many people believe that only things that can be observed, measured, and quantified can be considered scientific.
In recent years, coffee roasting education and software have often divided the roast into three phases: Drying, Maillard, and Development. As a result, many people discuss how to extend or shorten a particular phase. For example, I once saw someone online who wanted to “extend the Maillard phase,” and the solution they proposed was to reduce power earlier.
Let the RoR Decline Gradually, Regardless of the Roast Plan
My view is that roasters should follow the natural progression of the roast and allow the RoR to decline gradually (even if, in the middle of the roast, you find the planned settings are wrong). Otherwise, the movement of heat through the different layers may lose continuity, and the RoR may no longer decline smoothly.
What does it mean to follow the natural progression of the roast? It means understanding the available heat at that moment, anticipating how the coffee will absorb heat and release water vapor, and developing the appropriate plan accordingly. The resulting roast time should emerge from that plan.
Please remember: time is not the direct reason coffee tastes good.
We cannot set a very high preheat temperature (PH) and then suddenly reduce power at a point when power should not yet be lowered. Nor can we set a very low PH and later force more heat into the roast in an attempt to push the coffee into a predetermined time target.
The first approach can cause the RoR to decline too early or too quickly, potentially leading to a crash or stalled RoR later in the roast. The second can cause the RoR to rise suddenly and then too much moisture content leaves the beans, which makes the RoR crash and stall. Both approaches can disrupt the continuity of heat transfer and prevent the deeper layers from receiving sufficient heat at the appropriate time.
How to Roast
Ready to Put These Ideas Into Practice?
Follow my step-by-step guide to roasting on the Aillio Bullet R1 / R2, from understanding your coffee to reading the roast profile and deciding when to end the roast.