Most Aillio Bullet users can find roast profiles online. The real challenge is knowing what to pay attention to before changing power, fan, drum speed, or preheat temperature.
This guide walks through the basic thinking behind roasting on the Bullet R1 / R2: what coffee you are roasting, how heat enters the bean, how moisture leaves, how layers are formed, and how the roast graph reflects what is happening.
I have been roasting on the Aillio Bullet since 2017 and using it in a real café and small-roastery workflow since 2021. I will not give universal power, fan, or drum-speed numbers here, because those numbers only make sense under specific conditions. The detailed decision-making process is taught inside the membership area.
Step 0: What Is Coffee Roasting
Coffee roasting can be understood from many different perspectives. But if I had to explain coffee roasting in one sentence, it would be:
To guide the “just right amount of heat” into the desired layers, while controlling how much moisture and terroir each layer is able to lose.
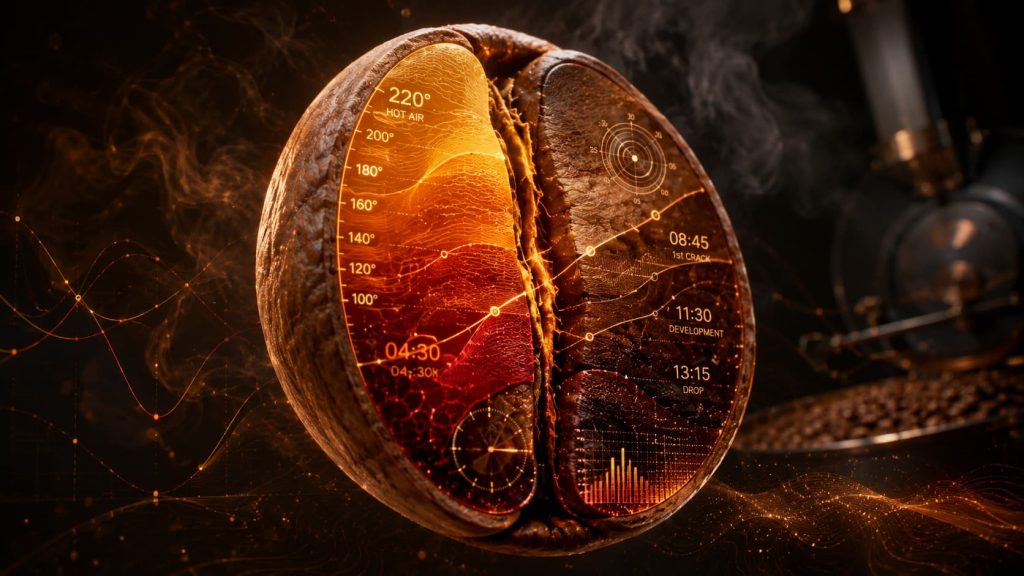
Heat in a coffee bean is conducted from the outside to the inside. This is why I understand the coffee bean as layers upon layers. Being able to control the gain and loss of those layers is a basic ability of a roaster.
Gain refers to heat momentum. Loss refers to moisture release and the possible loss of terroir expression.
Heat has three different forms. Read this article to better understand the heat in the environment and the main heat source supplied by different roasting machines:
In the world, only a small number of roasters can truly control gain and loss at will.
Coffee Roasting Is Extremely Dynamic
Even when roasting the same coffee, if the environmental conditions are different, there is only one correct way to create a specific gradient, or a specific set of layers. And that “one correct way” is never fixed. It changes from moment to moment.
By “one correct way,” I mean all the inputs I decide to use throughout the entire roast, including preheat temperature, drum speed, how I increase fan speed, how I decrease power, and so on.
Therefore, please stop using D9 for every coffee you roast. Please don’t. Besides, do not take a random roast profile online and copy it without being told the reasons behind every decision / input.
I will teach the detailed method inside the Member’s Section and show everyone how to make these judgments.
⚠️ What To Avoid Before Choosing A Roast Approach
Using D9 for every roast.
Copying a random profile online without knowing the reasons behind every input.
Looking only at the graph (profile) instead of real heat transfer.
Step 1: Know Your Coffee Before Choosing Preheat, Drum Speed, Power, and Fan Speed
After reading the membership articles, simply knowing your coffee and batch size puts you 90% of the way toward a successful roast.
Different Coffees Gain Heat and Lose Moisture Differently
Processing method, such as natural, washed, or honey process, and bean size both matter. These factors indicate the coffee’s ability to absorb heat and the amount of moisture it needs to lose.
After thinking through this information, you can begin to DECIDE the preheat temperature (PH), drum speed, maximum power, and maximum fan speed. I want these inputs decided before charging, because they shape the direction of the whole batch. Another thing, you need to consider the desired roast degree for this batch, which is going to be explained in the next Step.
Finally, I also use my eyes to observe the coffee and see whether the beans look very green and fresh. For example, not all washed coffees look equally green. The greener the coffee looks, the more moisture it usually needs to lose. This is why not all washed Ethiopian coffees should be roasted in the same way.
If enough moisture does not leave the coffee, the flavor can become unclear. I consider this one type of roast defect.
Finally, I also adjust some parameters according to today’s weather. I need to look at the thermometer, but I also need to feel the roasting environment with my body.
What Are Common Batch Sizes?
Last but not least, bigger batches usually need a higher preheat temperature. My preferred and suggested batch sizes on the Aillio Bullet R1 / R2 are:
350g / 600g / 700g / 800g
Relevant preheat temperatures and other settings will be mentioned in the Member’s Section. My approach is quite different from many common methods online, and it produces very good results.
According to Aillio’s official R2 specifications, the Bullet R2 Pro has a maximum roast capacity of 1200g, while the Bullet R2 has a maximum roast capacity of 1000g.
⚠️ What to Avoid When Reading the Coffee
Judging the coffee only by origin name or processing method.
Ignoring visual clues such as greenness, freshness, and bean size.
Choosing batch size only by machine capacity, without thinking about how that batch will gain and lose heat.
Reusing the same preheat temperature, drum speed, maximum power, and maximum fan speed without checking today’s weather and machine condition.
Step 2: Decide The Roast Degree
In this section, “darker” does not always mean dark roast. It means roasting darker compared with the lightest expression of that same coffee.
A darker roast does not simply mean extending the development time.
To make a darker roast, besides extending development time, you also need to combine it with other operations for the coffee to taste good. A darker roast will inevitably have a higher end temperature. How to preserve proper terroir expression in a darker roast is a task many roasters need to work on.
Why Roast Darker
To Meet Customers’ Preferences
Some customers do not like acidity as much, or they prefer a heavier mouthfeel. Or they have never had a good light roast before, so when they walk in, they tell the barista: I don’t want light-roasted coffee.
When the Coffee Itself Is Less Appealing as a Light Roast
Some coffees do not taste as good when roasted light, because their nature is less appealing compared with coffees from other origins, such as Brazilian coffees. Please note that I use the term “less appealing,” not “roast defect.” I also say “compared with” other origins. In fact, even cheap commercial Brazilian coffee can taste very good if roasted well. Can you believe that?
The lighter the roast, the closer it is to the nature of the bean. Showing the nature itself is not wrong, and it is not a defect. People simply may not like that nature as much.
For Blending
In Step 0, I mentioned that “coffee roasting can be understood from many different perspectives.” Coffee roasting can also be understood as adjusting the ratio between roastiness and terroir / rawness. Some shops only need the roastiness of a coffee as the base, then pair it with another coffee that has stronger terroir expression. In this case, the base coffee needs to be roasted darker to reduce the dominance of terroir expression and allow roastiness to become a more stable foundation.
When Roasters Worry the Heat Has Not Reached the Core
This is probably the worst situation. When roasting a light-roast batch, some roasters worry that heat has not reached the core of the bean, so they greatly extend the time after first crack, which is development time, or DT. The core is influenced by heat, yes, but this causes the outer layers to lose too much flavor. At that point, their light roast no longer feels much like a light roast, because it is mixed with many more developed layers.
How to keep DT short while still making sure the core is fully developed, and how to keep DT long without making the coffee taste dry, are tasks that a qualified roaster should be able to achieve.
If the core of the bean is not well developed, there will be a peanut-like flavor.
A darker roast has a higher end temperature. Its terroir expression is weaker compared with a light roast, and its floral and fruity aromas are less obvious. Instead, it shows more buttery and nutty aromas, and the body and mouthfeel are heavier. The structure of the bean becomes looser and more fragile, so during extraction, you need to pay attention to avoid over-extraction. Usually, the grind will be coarser, and the water temperature will be slightly lower.
This article fully explains how brewing variables should work together. I think it is one of the few articles online that explains this topic very completely:
Below is a short and brief list of metrics on a darker roast, compared to a light one:
End Temperature
Higher
Weight Loss
Higher
Terroir Expression
Weaker
Color
Darker
What needs to be noted is that a darker color does not necessarily mean a good and normal darker roast. As long as we roast long enough, the color of the coffee beans will become darker and blacker no matter what. The key is to control the gradient of the coffee beans well. Only then can it become a cup of coffee with continuity.
The actual method will be taught in the Member’s Section. But below, I will provide a clear guide.
A Baseline Profile Is Necessary
Remember in Step 0, I told everyone not to take a random profile online and then copy it, right? But now I am saying that a baseline profile is necessary. This may seem a little contradictory.
Use the Same Coffee as the Reference When Adjusting Roast Degree
The reference here means using the “same coffee” as the reference. No matter what roast degree we want to roast this coffee to this time, we must know how this coffee should be roasted if we want to roast it light. Then, using this light-roast profile as the baseline, we adjust it into a medium-roast or dark-roast profile.
To put it more simply, suppose we want to roast Brazil as a dark roast. Whether Brazilian coffee tastes good as a light roast or not, we still need to clearly understand how Brazilian coffee should be set up as a light roast before making related adjustments. But usually, a light-roasted Brazil will not taste that good.
Use Different Coffees As The Reference When Discussing General Roast Techniques
When would we use different coffees as references? When we receive two coffees that are clearly different in appearance, processing method, and origin, and we want to roast both of them as light roasts, then we can compare the profiles of these two coffees.
Therefore, comparing a “washed Ethiopian light roast” with a “natural Brazilian dark roast” does not have much meaning in roasting discussion about roast degree.
Which Origins Do I Often Roast Darker
The examples here are general rules, not absolutes: Brazil, Central and South America, Asia, and lower-altitude coffees. Sometimes, I roast them to light-medium, while properly preserving pleasant acidity. To me, that also counts as darker.
⚠️ What to Avoid When Deciding Roast Degree
Extending development time and assuming the roast will automatically become better.
Roasting darker only because you are worried the core is not well developed.
Comparing profiles from completely different coffees and roast degrees.
Step 3: Read the Real-Time Profile on RoasTime
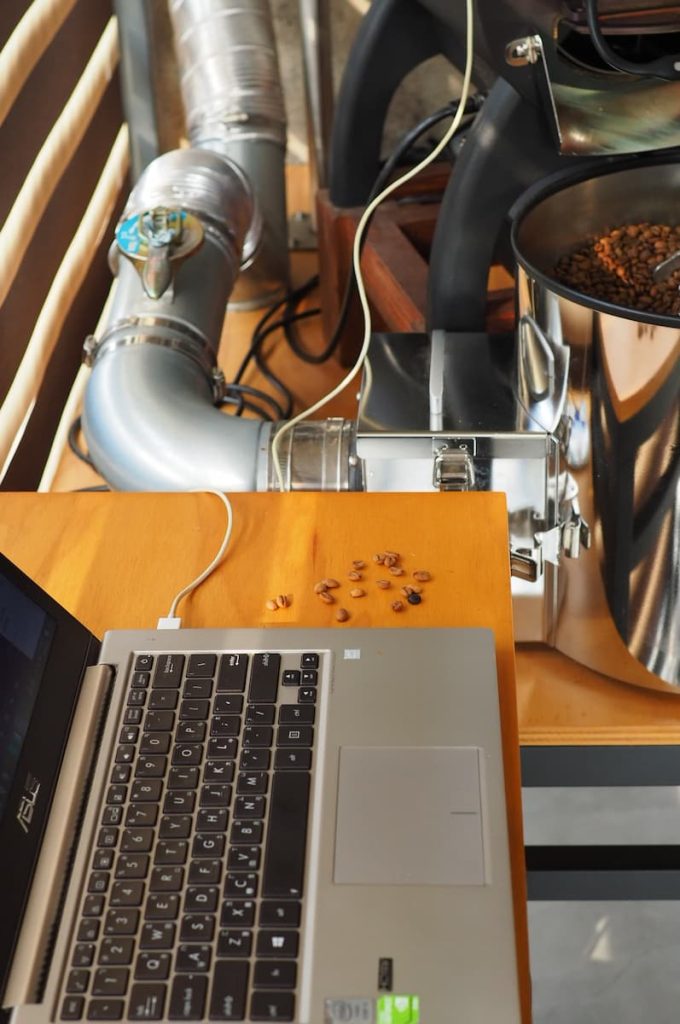
After charging the beans into the roaster, we start reading the real-time profile on RoasTime.
First, Identify Whether It Is a High or Low RoR Peak Profile
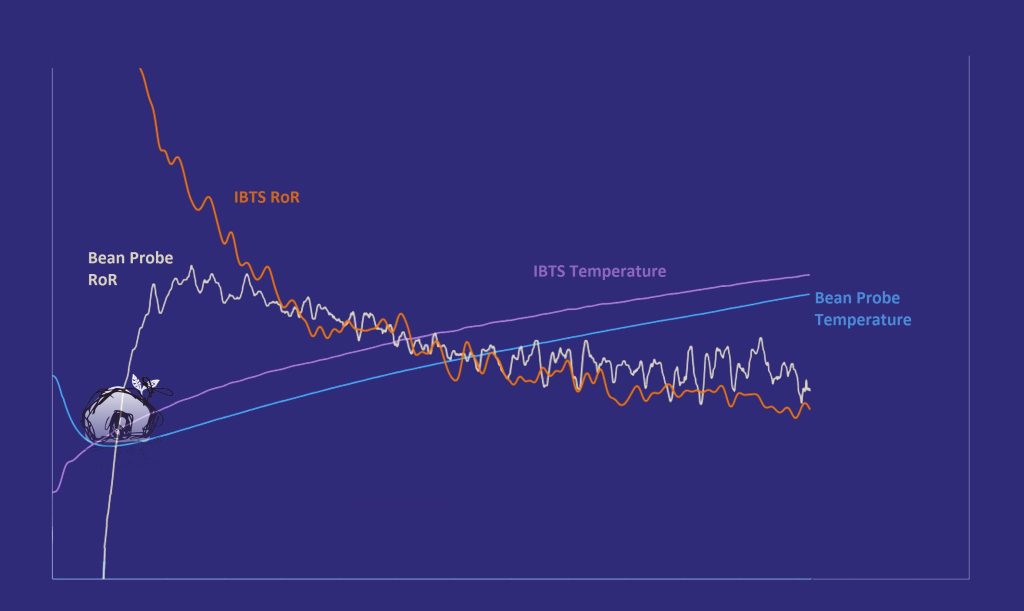
When judging the RoR peak, I refer to the bean probe. What counts as high or low? Below 14 is low. 14–15 is already medium-high for me. Above 15 is high.
There are many reasons why a coffee’s RoR peak can be high or low. Even coffees from the same origin and the same processing method do not necessarily have the same RoR peak.
A High RoR Peak Profile
During the first roast, I pay close attention to the RoR peak number. Many things can cause it to be high or low, and only by knowing the reason can we make the correct adjustment.
In the Member’s Section, I will teach you how to find out why the RoR peak is higher or lower, and how to respond with the most appropriate inputs.
Aillio has developed its own roasting software, RoasTime, specifically for its roasters. They also keep updating and improving the software. I do not like every update, but I really appreciate that Aillio continues to maintain the software. It shows that the company is still taking care of it, and that their thinking continues to move forward.
On ROAST.WORLD, you can also share roasts and exchange ideas with roasters around the world.
Most roasting software divides the whole roasting process into three phases: Drying, Maillard, and Development. This is a very convenient framework for roasters to discuss a roast. However, there is one thing I need to remind everyone:
Phase length does not guarantee coffee flavor.
No matter how many times I say this, I will repeat it again: remember, those phases are not the reason coffee tastes good. They are only the recorded result of what we did during the roast.
Coffee tastes good because, during the roast, we consciously and actively control heat and moisture. The graph is the result of our operation. It is not the reason coffee tastes good.
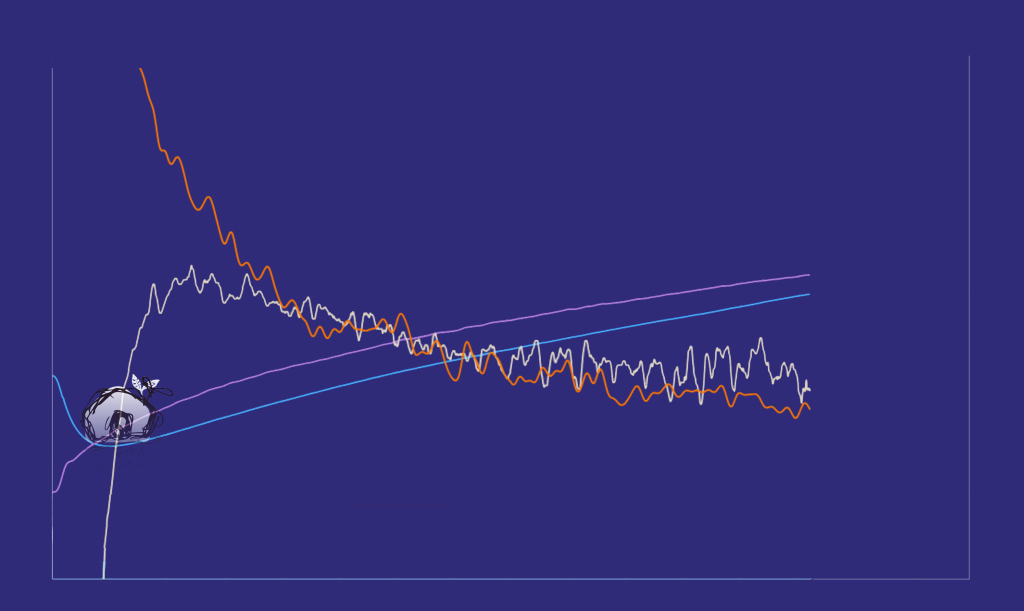
So do we still need to learn how to read the graph? Of course, we still need to learn how to read the graph, because when we roast, it is the only thing we can rely on and the only thing that stays recorded. That is why we need to spend time understanding how much information the graph is actually giving us, so we can make the correct inputs during the roast.
Very few people are willing to discuss RoR, heat, and the moisture chain deeply. That is why I spent a lot of time sharing many ideas in the Core Topics in Aillio Bullet Roasting section, especially in C. Heat & RoR Control. I highly recommend spending time reading that section.
Make the RoR Decline Gradually
Whether the inputs we plan to do before this roast were correct or not, we still need to find a way to make the RoR decline gradually.
You may notice that the smoke becomes heavier and heavier as the roast progresses. Coffee beans are extremely hard seeds, with a great deal of moisture trapped inside. If the RoR keeps declining at a steady slope during roasting, it means moisture is continuously being released.
In this article, I explain why RoR should gradually decline:
As for how to control power and fan speed, I will explain that in Step 4.
⚠️ What to Avoid When Reading the Roast Graph
Ignoring whether the RoR is gradually declining.
Forcing the RoR to decline without understanding the mechanism of heat transfer and moisture release.
Not using the profile to understand the bean’s nature and how heat is transferred during the roast.
Step 4: Control Power, Fan Speed, and Drum Speed on the Aillio Bullet
In Step 1, I mentioned that if we know the coffee and batch size before roasting, 90% of the roast direction is already decided.
The same idea applies to the planned power, fan speed, and drum speed settings. These controls should not be random reactions during the roast. They should be part of the roast approach we think through before charging the beans. The remaining 10% comes from the roaster’s real-time judgment and ability to respond to what is actually happening in the roast.
Since 2017, I have tested countless ways of roasting on the Aillio Bullet, including different approaches to power, fan speed, and drum speed. I have also brewed these coffees at markets and in a real café, and cupped them many times. I sincerely hope these articles can help roasters who want to understand the finer details of controlling the Bullet.
Plan the controls before charging.
How To Adjust Power
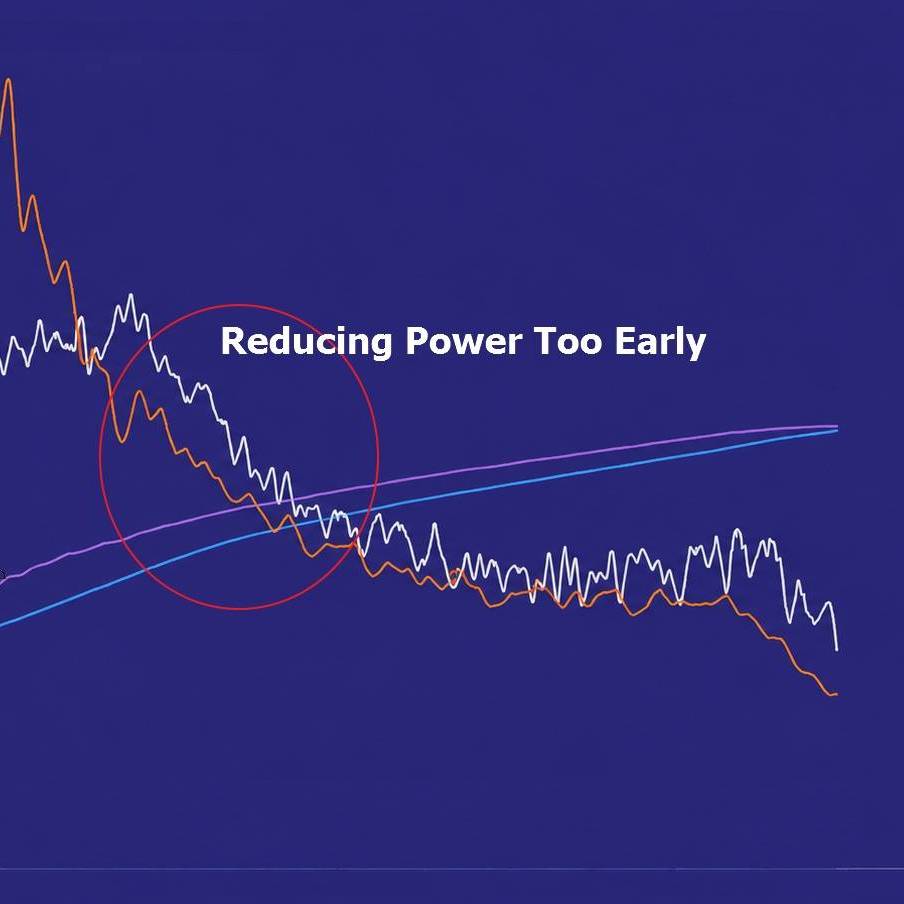
As mentioned in Step 3, during the roast, we should try to make the RoR decline steadily. Many people use only power or only fan speed to make the RoR decline. Based on my experience, please do not rely only on power or only on fan speed. Both need to be used together.
Why Adjust Power
During the roast, the surface of the coffee bean becomes drier and more fragile. This is why we need to gradually reduce heat. This is the biggest reason why power reduction is necessary. So usually, we reduce power instead of increasing power.
As mentioned in Step 1, my preferred and suggested batch sizes on the Aillio Bullet R1 / R2 are:
350g / 600g / 700g / 800g
When roasting different batch sizes, the maximum power will of course be different. In addition, many online tutorials say that because the beans are hard and dense, we should use high power. Therefore, many people change the maximum power according to different coffees, and then reduce power in the middle of the roast. I do not recommend doing this.
Do Not Decrease Power in the Middle of a Roast
Personally, I do not recommend reducing power in the middle of a roast at all, because the drum (heated by induction board) is the only main heat source on the Bullet. Throughout the whole roast, it must continue to provide a stable heat source.
Of course, some coffees need more heat. But on the Bullet, the method is not to use a very high charge temperature or high power at the beginning, and then reduce power in the middle of the roast. (If only coffee roasting were that easy!) Instead, we need to adjust the accompanying inputs.
In the Member’s Section, I will teach in detail how to roast each different type of coffee.
How To Adjust Fan Speed
If you have ever roasted coffee in an open space, you have probably noticed that the amount of smoke released during the roast only increases; it does not decrease. This is why fan speed usually needs to increase gradually throughout the roast.
Know the Maximum Fan Speed for the Batch
Still, we need to know the maximum fan speed for that batch. Depending on the coffee and today’s weather, the maximum fan speed is dynamic. But even though it is dynamic, we should still have a rough outline before the roast begins. The planned inputs need to stay within our control.
There will be clear and detailed fan-speed instructions in the Member’s Section.
I do not start a roast with a very high fan speed. Usually, I start low and increase it gradually. For a 600g batch, I start with F2. For a 700g batch, I start with F3.
Compared with power and drum speed, fan speed may look the least harmful. However, if it is not controlled well, it can create vegetal bitterness or make the flavor less clear.
The main function of fan speed is to carry moisture away and adjust the balance between terroir and roastiness. If too much moisture remains before Maillard, the cup can become unclear and may show green, grassy, or bell-pepper-like bitterness.
Simply increasing fan speed is not enough to avoid this kind of vegetal bitterness. This is why I mentioned earlier that we need a clear plan before the roast begins. In the Member’s Section, I will provide clear and detailed instructions on fan-speed adjustment, and I will also explain how power and drum speed should be used together, including their priority.
I often see many people in the Aillio Bullet R1 / R2 User Group on Facebook using only F2 / F3 from beginning to end. I do not recommend doing that at all.
When To Adjust Drum Speed
Drum speed on the Aillio Bullet should be adjusted according to the coffee’s nature, batch size, and roast degree. It is not something that should remain the same for every roast.
On the Bullet, there are really only three parameters that we can actively control: power, fan speed, and drum speed. Why do I emphasize the word “actively”? Because other conditions, such as air temperature, humidity, atmospheric pressure, and altitude, are environmental factors that we can only adapt to.
Drum Speed Affects the Entire Roast
Before making any adjustment, we should first understand whether that adjustment affects the entire roast or only a small part of it.
Among the controllable parameters mentioned above, adjustments to power and fan speed usually have a relatively smaller impact on the overall roast and tend to affect only a particular stage. Although every stage is connected, if we make a mistake and correct it quickly, there is usually still room to recover.
However, preheat temperature and drum speed have a much broader influence on the entire roast profile. Once a wrong decision is made, the whole batch becomes very difficult to recover. This is why I said earlier, “Plan your controls before you start to roast.” Learning the correct concepts is just as important.
Should We Change Drum Speed During the Roast?
My recommendation: No, we shouldn’t. However, sometimes there will be exceptions, which I will explain in the Member’s Section.
I have seen people change drum speed in the middle of a roast. My guess is that they are trying to make the roast profile look better. If you find yourself needing to change drum speed halfway through the roast, it usually means that your understanding of the coffee before roasting, or your original plan for power, fan speed, and drum speed, was not accurate enough.
Should We Use Fan Speed or Power Throughout the Roast to Achieve a Declining RoR?
The better approach is to use both together.
Using only fan speed throughout the roast and using only power throughout the roast will each produce extreme effects. Keep in mind that whenever any parameter is adjusted, other inputs may also need to be adjusted so the coffee can continue receiving heat properly.
Do I Recommend Using the Recipe / Overlay / Playback Functions in RoasTime?
I do not really recommend them. However, in Step 3, I wrote, “Plan the controls before charging.” This may seem a little contradictory.
What I mean by “Plan the controls before charging” is that we should already know the maximum power, maximum fan speed, and how to coordinate “decrease power” with “increase fan speed,” and then adapt to the situation as the roast develops.
It does not mean using a recipe to specify what action must be taken at a certain temperature.
I have not used the recipe / overlay / playback functions in RoasTime for many years. Based on my memory, they usually use temperature and time as triggers to change power, fan speed, or drum speed. Aillio officially recommends using IBTS temperature as the trigger and not including a time reference.
A Word of Caution About Using Recipes
IBTS temperature can only show the condition of the bean surface. It does not represent the actual heat transfer or moisture release happening inside the coffee during the roast. Heat keeps changing throughout the entire roasting process, which is why I wrote that we need to adapt to the situation as it develops.
For example, as more and more hot air is released, the roasting room becomes hotter and hotter (ambient temperature), and the whole roaster also becomes hotter (radiant heat). These are not things that can be fully anticipated when writing a recipe. If the sun happens to be very strong that day, the whole building will continue heating up and become even hotter. On top of that, there may also be other weather changes, such as rain or the low atmospheric pressure of a typhoon.
When radiant heat in the environment becomes stronger, we usually lower the charge temperature slightly or use the soak technique. Related reading: Radiant Heat’s Impact in Coffee Roasting
The methods I teach in the Member’s Section can adapt to small changes in temperature.
Under What Conditions Do I Think the Playback Function Can Be Used?
If you are truly busy at work and cannot stay beside the roaster from beginning to end, I think playback can be used only under two conditions:
The profile must be one that you roasted yourself.
The two roasts must be carried out within a short period of time. They do not necessarily have to be on the same day, but the weather should at least be the same, and the greens (coffee) should not have changed (deteriorated) too much. If they are roasted on the same day, back-to-back batches are even better, but keep in mind that radiant heat from the drum will become stronger and stronger.
Do not use playback with a profile shared online by someone else.
Should We Roast With AI?
Recently, some companies have developed AI software to help roasters roast coffee. However, if this type of system mainly relies on existing profiles or broad categories such as origin and processing method, it may overlook the differences between individual coffees and the ambient changes that continue to happen during the roast. Coffee is a natural agricultural product. How could it remain exactly the same over time? In my opinion, this is not real intelligence.
Coffee is a crop. No harvest is ever exactly the same.
A roast profile must adapt to the coffee, not assume the coffee will always behave the same.
Coffee roasting requires us to adapt to the situation as it develops. Therefore, it is important to watch / read the graph during the roast and understand what the graph is telling us. This is why Step 3 tells you to Read the Real-Time Profile on RoasTime.
I have placed all of my articles about profiles and RoR in this section: C. Heat & RoR Control I highly recommend spending time reading this section.
Yes, I know I may seem a little overly particular, but if we want to produce truly refined coffee, this level of attention is necessary. Coffee is highly affected by heat and moisture, so even small differences can lead to noticeable results.
⚠️ What to Avoid When Controlling Power, Fan Speed, and Drum Speed
Using only power or only fan speed to force a declining RoR.
Reducing power too early and treating it as the main solution for every roast.
Keeping fan speed fixed throughout the roast without considering smoke, moisture release, and the balance between terroir and roastiness.
Step 5: Drying, Maillard, First Crack, and Development: How to Interpret the Phases
RoasTime divides a roast into Drying, Maillard, and Development, which is useful for describing what happened during a batch. However, I do not treat these phases as reference of flavors. What matters more is how heat moves through the different layers of the coffee, how moisture is released, and whether the RoR continues to respond normally throughout the roast.
Before Looking at the Phases: Temperature, Heat, Color, and Time
Temperature, RoR, roast color, weight loss, and time all provide useful information, but none of them can explain a roast on its own. Two batches can reach similar temperatures, colors, or times while experiencing very different heat-transfer and moisture-release histories.
Some roasters define their roasts ONLY by using one of the metrics mentioned above. (End temperature, RoR graph, colors , or weight loss.) However, please note the purpose of reading these measurements is to help us understand what may be happening inside the coffee—the numbers alone do not represent the actual flavors.
A scientific framework may sound more professional, but it will not necessarily help a roaster make better decisions during the roast.
Drying: Build the Conditions for Heat to Move Deeper
The drying phase is more than simply removing moisture before yellowing. During this period, heat begins moving from the outer layers toward the deeper parts of the bean while moisture is also migrating and leaving the coffee.
This is why I do not judge the drying phase by drying time alone. I pay more attention to whether Gain and Loss remain balanced and whether the RoR continues to behave normally as heat and moisture move through the bean.
At yellowing, I pay close attention to the yellowing temperature. As the roast progresses, I also pay attention to how power is reduced / airflow is increased to maintain the desired RoR progression.
Simply extending the Maillard phase does not guarantee more sweetness. The more useful question is whether heat continues moving through the desired layers while moisture is released at an appropriate rate.
If adjusting phase length were the most useful way to control flavor, then how should we explain the differences between those four conditions? :
A high preheat temperature + less power during the roast
A low preheat temperature + more power during the roast
Using airflow as the primary way to control the roast
Using power as the primary way to control the roast
These four approaches could produce similar phase lengths, but would they produce the same flavor? I do not think phase time alone can answer that question.
How [heat is applied] and [power is reduced / airflow is increased] are very important to the final result. These will be discussed in the Member’s Section.
First Crack and Development: Decide When to End the Roast
After First Crack, small changes in heat and time can quickly change the final flavor. I watch whether the RoR remains continuous and consider development time together with end temperature.
Under a normal roast, the expected DT and end temperature should arrive at roughly the same time. If they do not, I generally give more priority to DT. I also do not treat DTR as a fixed target. In my view, DTR is most useful when the progression of heat through the coffee has remained continuous rather than being interrupted by an RoR crash.
The phase labels help us describe a roast, but they should not dictate the roast. Without a deeper understanding of heat, environment, and the nature of the coffee bean itself, data can easily become a polished but unfocused discussion.
⚠️ What to Avoid When Interpreting the Roasting Phases
Treating Drying, Maillard, or Development time as a fixed flavor target.
Judging a roast by only one metric, such as end temperature, RoR, roast color, weight loss, or DTR.
Extending or shortening a phase without considering how heat is being applied and how moisture is being released.
Step 6: Cool the Coffee Fast Enough After Drop
Dropping the coffee does not mean the roast stops thermally in an instant. The main external heat source has been removed, but the beans are still extremely hot and retain a considerable amount of thermal energy. As long as the temperature remains high enough, thermal progression can continue after drop.
This is why I consider cooling the final step of controlling a roast.
Baggenstoss et al. compared coffee cooled with forced ambient air for 4 minutes with coffee allowed to cool naturally for approximately 45 minutes. The naturally cooled coffee became slightly darker, which the researchers attributed to its slower decrease in temperature and slightly higher final roast degree.
In other words, the roast degree you choose at drop can still change if the remaining heat is removed too slowly.
For this reason, I recommend cooling the beans as quickly and evenly as practical. Cooling performance depends strongly on airflow, batch size, and especially ambient temperature. Simply stirring the beans helps distribute them, but without enough airflow to continuously remove heat, the improvement in cooling speed is limited.
The goal is simple: once you have decided where the roast should end, remove the remaining heat efficiently so the coffee does not continue moving away from that decision.
Assuming the roast has completely stopped the moment the coffee leaves the drum.
Relying on stirring alone when airflow is too weak to remove heat efficiently.
Using the same cooling expectation in summer and winter without accounting for the temperature difference between the beans and the surrounding air.
step 7: Taste the Coffee and Refine the Next Roast Profile
Although RoasTime records the roasting process and gives us a general idea of whether the roast was successful, eventually, we still need to taste the coffee.
I know the flavor will change over time, but I usually cup the coffee on the same day it is roasted. The reason is that, I, as a café owner, do not have time waiting for the coffee beans to rest. My goal is to know whether my interpretation of heat transfer, moisture release, and roast progression is actually reflected in the cup.
Connect What You Taste Back to the Roast
When I cup freshly roasted coffee, I pay attention to more than whether it simply tastes good.
A peanut-like or cereal-like flavor can indicate that heat did not reach deeply enough into the inner layers. Vegetal or green bitterness may indicate that too much moisture remained. A muted or closed cup may still be retaining too much moisture and terroir expression, while a bland or flat cup can result from insufficient heat or from removing too much moisture and terroir expression.
Also Use Sweetness and Flavor Balance to Evaluate the Roast
I also pay close attention to sweetness. Even if other roast defects are present, I still want the coffee to retain some sweetness. The balance between acidity, sweetness, and bitterness helps me understand how the different layers developed during the roast.
A coffee that tastes good immediately after roasting does not always mean every layer developed properly. Some flavors may temporarily mask problems deeper inside, and those defects can become clearer after a few days of resting.
Use Cupping to Decide the Next Adjustment
After cupping, I do not simply decide to make Drying, Maillard, or Development longer or shorter.
The duration of those phases is the result of what we do with power, fan speed, drum speed, heattransfer, and moisture release. When these change, phase time naturally changes with them.
And no matter what I adjust in the next roast, I still follow the same principle:
Roasting must follow the natural progression of the RoR.
This is how I try to maintain a continuous gradient between the outer and inner layers of the coffee.
⚠️ What to Avoid When Evaluating and Adjusting a Roast
Judging the roast from only one tasting moment.
Some defects may also become easier to detect after masking aromas begin to fade.
Assuming stronger aroma means a better roast.
Very strong floral or fruity aromas immediately after roasting can also indicate excessive heat application and may be associated with a shorter shelf life.
Trying to fix a roast defect with a one-dimensional solution.
A roast defect rarely comes from only one variable. Focus on the priority of each variable and how they work together.
The Member’s Section: A Decision System for Aillio Bullet Roasting
Eventually, roasting should begin to feel like something you truly understand. It should not be something you are borrowing from someone else. You can read the coffee, make your own decisions, and know why they make sense.
If you want to go further and understand how I interpret a roast, adjust drum speed, power, and airflow, and connect cupping results back to the roast profile, I share more complete real-world examples and the thinking behind those decisions in the Member’s Section.
Go Deeper
Continue with the Aillio Bullet Member’s Section
A more structured way to connect the ideas throughout this guide and understand how roasting decisions relate to one another.